Wednesday, August 7, 2013
Wednesday, July 24, 2013
Wednesday, June 26, 2013
Sunday, June 16, 2013
Cotton Candy Summertime Nails!
First start off with any Base Coat, I used Orly Bonder...

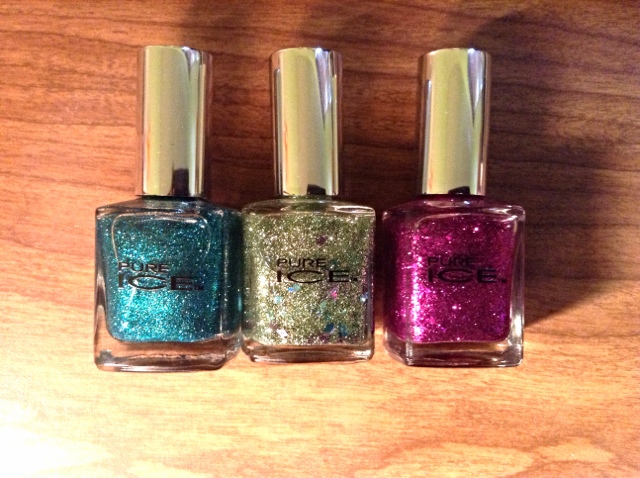 Watch Me Go, Sheer Luck, Keep Walking by Pure Ice


Here is the finished look! 


Then use a cosmetic sponge and 3 different cotton candy colors to make a tricolor sponge design...
Brisk Blue, Mint Sprit, Presto Pink by Sally Hansen Insta-Dry
Once dry, cover each of the areas with a glitter that matches the shade in that area...
I painted my two accent nails with this indie polish from Hit Polish Nail Lacquers called Turq-ish Delight...
Then use a 3D Charm Bow and Super Glue to place at the base of the accent nails...
Use any Top Coat and you are done...
Please feel free to try your own color variation and share on Instagram @jarinleslie
View the YouTube video of this look below!
Saturday, June 15, 2013
Tuesday, June 11, 2013
Losing my Indie Virginity: My first Indie Experience!


Ok, so after listening to my friends on Facebook obsess over Indie polishes I decided that maybe they really were worth all of the hype and I should give them a try. I stumbled across Hit Polish by D&R Apothecary on Etsy and saw that they were having a sale and their mi is were super cheap. I figured that if I ordered a few mini bottles, at a good price, I wouldn't be too bitter if I didn't love them
I ordered 5 mini bottles and it was just at $15.00 once shipping was included...very affordable....after only about 4 days wait they arrived in my mailbox in an adorable little box...

The inside was full of packing peanuts to assure that my little darlings would make it safely to my house, and my packing slip included a handwritten note. I appreciated that a lot...:)


The mini bottles were bubbles wrapped in a wild zebra print bag, I also thought that this was a cute and personal touch...

Again, to ensure safety, each individual polish was sealed in a tiny Ziploc bag in case there was any leakage...

Overall, I can say that I was greatly impressed by the attention to detail and the extra precautions that were taken to make sure that my order arrived problem-free. Something you don't get from big corporations....
So let's take a look at what I got...
The first color I opened was Turq-Ish Delight. This is a beautiful,bright blue base with blue, pink, and various other glitters in it...


Next, I chose a gray base with red, blue, and yellow glitter in it called Concrete Jungle...


The next polish was a no-brainer for me as it was was named after my all-time favorite cookies...Oatmeal Raisin Cookies is a brown base with chocolate brown and copper glitters inside...


Next is Green Kryptonite, a dark gray base with a mixture of green glitters...


I can say that the formula is just as good as any store bought polish and these are some of the more unique colors that I own now. I am sure that not all independent polish makers are as affordable, concerned with quality, and personable as this vendor but as they say, if it isn't broke, don't fix it...
Therefore I am heading to her website now to see if I find any more minis to bring home!!!
God Bless!!! View my BIG polish haul video above to see these polishes and my live review!!!
Sunday, June 9, 2013
Sunday, June 2, 2013
Saturday, June 1, 2013
Friday, May 31, 2013
Sweetheart Nail Design using Kiss Marbleizing Pens...

I must say that I was completely smitten by the items I received in my Nail Art Society Kit for May!
This was my first kit and I have literally been chomping at the bit to use these a-MAY-zing products!
However, with my big move, my nails were in complete retirement for a week or so, and were looking like a wreck! I spent some time tonight putting on a new set of acrylic nails at home, and then I had to decide how to paint them!

I really love this gradient heart look and decided to give it a go!
I began by painting all of my nails with Milani, White on the Spot, as a base...


Naturally I had to use two coats to make it an opaque white color...
Then I opened the Marbleizing Pens and was amazed!!!!
They come in three gradient colors and they can be used as regular polish with a regular twist off cap, OR you can pop the top cover off and have a very intricate nail art pen....
Consider my mind officially *BLOWN*!!!! :)


Then I used the darkest color, my Milani White, and then another layer of the darkest color to create a dark purple heart, outlined by a white base, for an accent nail...

For my pinky, I used the middle purple, to paint my entire pinky nail and then I covered it using Julep's Paris holographic glitter...I also used this gorgeous glitter to accent the heart on my ring fingers!


Once I was done I finished the design off using Seche Vite topcoat...


I must have more of these! I hope they have them in different color schemes or I might cry! :)
Let me know what you think and don't forget to view my YouTube tutorial of this look!!!


Subscribe to:
Comments (Atom)